 Windows Informer Windows OS Tips
How to system restore in safe mode windows 7?
Here, we are going to tell you about how to system restore in safe mode Windows 7. Windows System Restore is the best option to recover your Windows Operating System from the place you try to fix the issue. System Restore is mainly used when you couldn’t able to fix the issue and when you want to go back to the place where you have started fixing the issue.
System Restore is simply reverting back by changing all the settings you have done to fix any issue on your Windows Operating System. Microsoft has given an option to create System Restore on all versions of the Windows Operating System. If you have a Windows 7 Operating System then you can follow the complete article and then implement it on your Windows PC/Laptop to create a Restore Point.
Before you try to create a Windows System Restore on your Windows Operating System, you need to understand what exactly System Restore does? Even if you do not create a System Restore, Windows Operating System will create its own restore point to revert back to the place where you have started changing the settings. So, if you think that there something wrong then you can use System Restore option and then revert back all the changes you made. System Restore doesn’t make any changes and you can get back all your data without losing files.
But sometimes, you may think that if you want to create a System Restore of your own on your Windows Operating System, then you can follow the steps mentioned below to System Restore on Windows 7 Safe Mode.

Step by Step Guide How to system restore in safe mode Windows 7
Here, are the simple steps of how to system restore in safe mode Windows 7 Operating System. Follow them and implement them on your Windows 7 Operating System.
Remember that System Restore doesn’t affect any files on your Windows Operating System.
- Open your Windows 7 Operating System and then click on the Start Menu.
- Type System Restore and then click enter. You can see the search related to the System Restore.
- Click on System Restore label and then you can see a new window with System Restore point.
- If you want to change the System Restore point then you can click on Show more Restore Points checkbox which is below the mentioned System Restore point.

- After you choose the System Restore point you want. Remember that each Restore Point will have its own description.
- Click on Scan for affected programs as it will scan all the programs and files. You can also see the drivers and programs that will be uninstalled and reinstalled while performing System Restore.
- Now, you need to review your System Restore before you resorting your System Restore on your Windows Operating System.
After you complete all the process, then click on the Finish button. Now, your System Restore starts, and then you need to wait for the complete process to complete. If you wish to do any other work until the complete process is done, then you can carry on with that work.
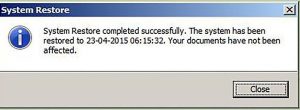
After a few minutes, you can see a message that System Restore has done successfully. Click on Close and then start using your Windows 7 Operating System Safely.
Hope this article has been helpful to you to get the knowledge about How to use System Restore Windows 7 Safe Mode. If you have any further doubts about this article then please feel free to comment below. We will be happy to help you out:)
You can also follow us on Facebook: Technews
If you want to know more information related to windows 7 then please visit do visit this page windows 7🙂