 Windows Informer Windows OS Tips
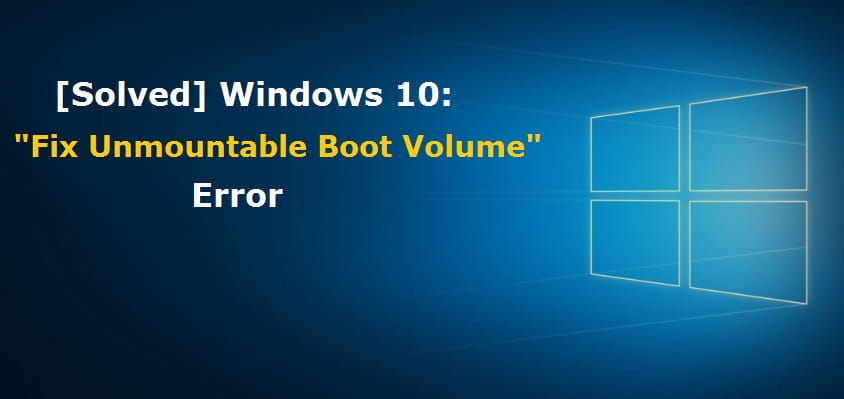
unmountable boot volume windows 10 : If you have already tried to fix Unmountable Boot Volume Error on your Windows 10 Operating System. Then you can try the methods which I have explained in this article. Today am going to explain to you three different methods to fix this kind of issue. Try any of the mentioned methods and then try to fix the issue else if you make late then you may need to replace your hard drive from your Windows PC/laptop. The Unmountable Boot Volume Windows stop code error is a pain. Since it usually keeps you from getting into Windows, you can’t troubleshoot it like you would with other errors.
Unmountable Boot Volume Windows 10
Different Methods to Fix Unmountable Boot Volume Windows 10
Method 1#. By using Command Prompt on your Windows 10 OS
You can use the command prompt on your Windows 10 OS to fix the issue manually from your PC/laptop.
- Open your Windows OS from the bootable drive i.e. you need to open your Windows Operating System from the DVD or USB drive.
- After opening your Windows 10 OS from Bootable Drive, you need to select the Repair your Computer option which is at the left corner of the screen window.
- Now choose Command Prompt option under it.
- You can see a black screen window with some commands in it. Now you need to use this command prompt to fix the error.
- Enter chkdsk /r c: and press enter. ( if your bootable drive is other than C then replace the C with your bootable drive name).
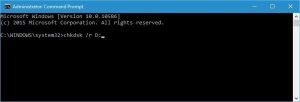
- Now it will ask you a question regarding the disk to restart your system.
- Simply enter Y and then press enter.
- Now Ckdsk will check for all the drivers and then fix the issue.
You need to relax and calm as it takes much time to check all the drivers installed on your Windows 10 Operating System.
Method 2#. By fixing the Master Boot Record
- You can also fix the Windows Unmountable boot volume Error or unmountable boot volume windows 10 by fixing the Master Boot Record on your Windows 10 Operating System.
- Open your Windows 10 Operating System from the DVD or USB Drive.
- Choose Repair Your Computer option among the options and then you need to choose other options like Command Prompt in the next window.
- After you see a black screen window, you need to enter the command as bootrec /fixboot and then hit enter.
- Now restart your Windows 10 Operating System and then you can see that ckdsk will check all the drivers for any errors and then it will fix the error automatically.
It will take much to repair all the errors from the drivers on your Windows 10 Operating System. So until then, you can do any other work.
Method 3#. By using the Automatic Repair
- You need to open your Windows 10 Operating System the same as mentioned in the above methods.
- Choose Repair your Computer and then click on the Troubleshoot option.
- Under Troubleshoot, choose Advanced option > Automatic Repair.
- As you click on Automatic Repair, you will be asked to click Next to proceed.
- Select the OS which you want to repair and then it will start the process.
So after a few minutes, you can see messages as successfully completed. After the completion of all the steps, your unmountable boot volume window 10 will start working and you will come to know what causes unmountable boot volume windows 10?
Remember that if you see the same error after implementing the steps then you need to change your hard drive immediately from your Windows 10 Operating System. You can also watch the video related to unmountable boot volume windows 10.
This video will solve all your problems related to windows unmountable boot volume. Follow our Facebook page also Techysea.
Another related topic: click here